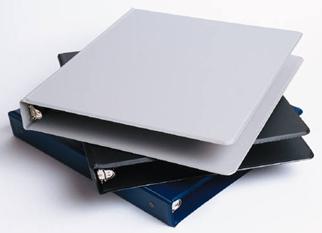
Organize your Recipes in a 3-Ring Binder
 I know if you are like me, you have a drawer full of recipes. Some were copied from the newspaper, some were printed off the computer, and others were handwritten. What a mess that drawer is and how much time does it take to find the recipe you are looking for? Hours I’m sure. Ok, so maybe that’s an exaggeration, but it feels like it sometimes.
Here’s an easy way to organize your recipes and make your time in the kitchen a little easier and less time consuming.
Purchase a two or a three inch 3-ring binder and a package of dividers from your local stationery store. You will also need notebook paper or computer paper and a three hole punch.
There are a few ways to do this. It will depend on how much time you want to invest in it as to which way you go with this project.
One way is to take your 8 ½ x 11 sheets and three whole punch them and set them aside. Now if you have other sheets that are not that size, you will need to do something to them to get them to an 8 ½ x 11 sheet.
To do this, you can write them on the notebook paper, you can tape them to a sheet of paper, or you can copy them with a copier. Whatever way you decide to go, you will need the sizes to be 8 ½ x 11.
Once you have them all done, you are ready to create the categories. Take the dividers that you purchased and write the categories you want. It may be easier to sort your recipes into categories first. That way you will know what you need to write on the dividers. You might have categories like desserts, drinks, casseroles, and main dishes. Just use what works for you.
Once this step is done, you are ready to three hole punch each sheet and insert them into your notebook. I recommend putting them in alphabetical order, but that is up to you for sure.
Now one other thing you can do is create a table of contents and list each recipe and the page number. This means you will need to number each page and this could cause difficulties if you add a new recipe to your book. You could create the table of contents and not list the page number. When you add a new recipe you would go to your computer add the new recipe in the order it is in the book and print it out again.
Now the other option involves the computer. You will need printer paper, a three hole punch, a two or three inch 3-ring binder, and the dividers.
You will need to take the time to type out each and every recipe you have and then print them out. Now you will want to make sure each recipe is on its own paper so you are not printing out two recipes on one sheet. Once this is done and you have them printed out, you will need to three hole punch them.
After they are punched, you will need to divide them into categories just like I described above. Then create your categories on your divider sheets and then put the book together. You can create the table of contents together the same way as described above as well.
Organizing your recipes and putting them into a 3-ring binder is a great way to keep them all together and nice and neat. Storing the 3-ring binder might be a bit of a challenge, but hopefully you will be able to find a drawer it will fit in or you might be able to place it in the cupboard that is close to the range.
Placing your recipes in a 3-ring binder will not only save you time when searching for a recipe, but it will help you to have more storage since you won’t have a junk drawer full of recipes, and it will keep your recipes in one place and you won’t have to worry about losing them.
Comments
 |
|
You Can Make Money. |
 |


Make Money with a Fitness Blog


Become a Ghostwriter for the Internet
Powered by Mom Webs Hosting